How To Wax A Car – Like The Pro’s
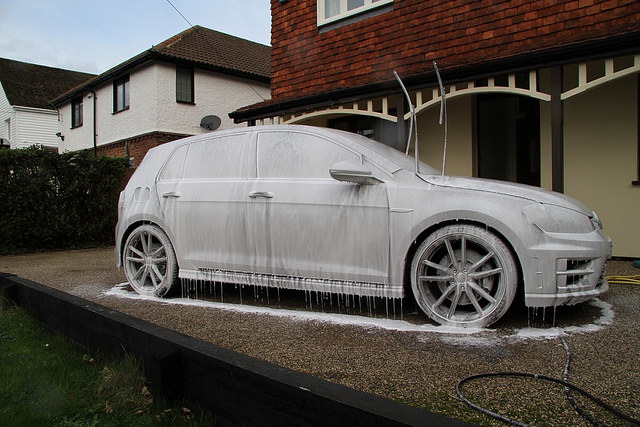
The simplest thing you can do to protect and preserve the beauty of automotive paint is by waxing your car. However, waxing is not a cure-all that will get rid of defects and imperfections in the paint, so you need to learn how to wax a car properly. Applying wax is the last step in an otherwise arduous detailing process.
This is the reason why it is important to inspect and assess the condition of the paint prior to applying wax. Rubbing wax over dirty paint simply won’t cut it. You won’t get the desired results, and the paint won’t be able to receive the protection that the wax provides.
Car Wax Rules and Prep
So, before learning the ropes on how to wax a car, there are a couple of things you need to remember:
- Waxing alone (even using two-in-one polish and wax products) will NOT remove swirl marks, scratches, tar, tree sap, asphalt, oxidation, and even baked-on bird poo. In order to correct and eliminate those imperfections, the paint will need to be pre-cleaned and polished prior to waxing. This holds especially true for black or dark-coloured vehicles. I guess you’re aware that swirl marks are most prevalent on black paint. With that in mind, it is important to point out that waxing black paint is not enough if you’re looking to remove scratches and swirls.
- The vehicle will need to be washed thoroughly using a proper wash routine. You must resist the urge to apply wax if the vehicle is not washed properly. Why? All those dirt and dust on the surface will only end up scratching the paint as you apply the wax, causing hugely damaging effects to your cars paint.
- Want to determine if the paint needs to be waxed? Check for water beading as you clean the car. If you see a lot of water beads after spraying water on the surface, you don’t have to apply wax as there is some sort of sealant already applied to the paint. But if you notice minimal amounts of water beads when the paint is wet, the finish could use a fine coat of wax to enhance the protection and shine.
- Paste wax or liquid wax? You can achieve marvellous results with both. I will discuss more on this later.
How to Wax a Car by hand– It’s all in the prep!
It is important to wax the car in a cool and shaded area. Park the vehicle away from direct sunlight or weather exposure.
If you can only wax the vehicle outdoors, it is best to wax a section of the vehicle at a time, instead of waxing the entire vehicle in a single swoop. The reason is to prevent dust and dirt from settling on the paint as the wax cures. Even a speck of dust is enough to scratch and damage an otherwise pristine finish.
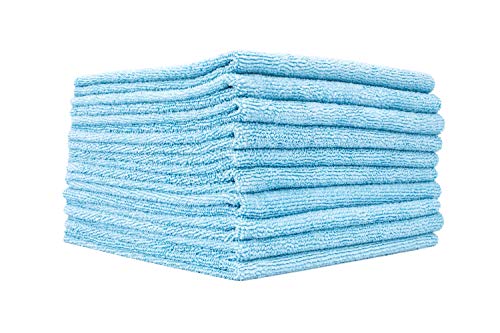
Learning the proper method on how to wax a car need not be expensive or complicated. All you need are good quality foam applicator pads, your wax of choice, a set of clean microfiber buffing towels, and a modicum of patience and common sense.
Checklist
Below I’ve created a handy checklist, just to make sure you are ready to go before waxing your car. I still refer to it now and I’ve done this hundreds of times, but it’s imperative to finalise every last detail before waxing your car.
Process
Step 1:
Wash and dry the vehicle. Like I previously mentioned, you can achieve the best results if you start with a clean and dry finish.
Now is also the best time to assess the condition of the paint. Lightly rub your dry hand over the paint and try to feel for rough spots on the surface.
If you feel the surface is rough, you should treat the paint with a full decontamination process and clay bar before you even think about waxing.
If the paint is riddled with scratches and swirl marks, it is better to polish the paint prior to applying wax.
Now don’t get me wrong. All of this may sound excessive for the average car owner, but I’m talking about achieving professional results. Some people might say it is better to apply wax (regardless of the condition of the paint) than not waxing at all, and I agree with that. However, it is best to do it right the first time around. The results will speak for itself once you’re done.
Step 2:
It doesn’t matter if you’re using liquid or paste wax. Like I previously mentioned above, you can achieve great results with both, but you need to apply the wax properly.
Liquid Wax
- Grab a foam applicator pad.
- Pour at least two or three pea-sized amounts of wax on the applicator pad.
- Squeeze the pad lightly to distribute the wax over the pad. These are the application procedures if you’re using liquid wax.
Paste/hard Wax
- Lightly dip or scrape the applicator pad inside the can of wax.
- Remember that a small amount of paste wax goes a long way. You don’t need to use much wax to achieve great results.
Whether using paste or liquid wax, remember that applying two or three light coats is better than applying a single thick coat. I’m not being economical here (although it is more economical to use less of the product each time), but excess wax over the surface will be difficult to buff out. It might also cause scratches or burn marks on the paint.
Step 3:
After saturating the pad with wax, lightly rub the pad over the paint using small, circular, and overlapping motions. There might be some debate on this, and the truth is you can follow my methods or simply rub the wax in an up-down or left-right motion. However, applying the wax in a circular motion will ensure better coverage overall.

Note, this is the only time that I use circular motions on the paint and that’s because I know it’s perfect ready for waxing.
When applying wax, make sure to work with one section at a time. Start with the upper portions of the vehicle before waxing the doors and the lower rocker panels. This will help to prevent scratching the paint and if there are any traces of dirt left on the paint, which can happen, it won’t move too far across the car.
Step 4:
Allow the wax to cure. This is the next important step. Unlike polish that should be buffed out immediately after application, wax should be allowed to dry to a haze.
The drying effect of the wax is simply the release of solvents or stabilizers as the wax cures. Some waxes will produce a whitish haze, while others will not be as obvious as the wax dries.

How long should you wait for the wax to dry? It depends on the weather or temperature, but 5 to 12 minutes is a safe bet. In order to be sure if the wax is sufficiently dry, do the swipe test.
Swipe your dry finger over a waxed surface and check to see if swiping exposes a clean and shiny finish underneath. If it does, the wax is dry. But if you see haze after swiping, the wax needs a longer to dry.
Step 5:
Once the wax is dry, it is time to buff out the residue or haze to reveal a glossy finish. Grab a clean microfiber towel, fold it in half, and proceed to remove the haze.
The trick is NOT to apply excessive pressure when removing the residue. It is also a good idea to start with the top-most portions of the vehicle before buffing out the lower panels. Again, this method is effective in preventing scratches and swirl marks in the paint.

It’s best to work with one section at a time. After removing the haze, turn the towel over and give the surface a light buff. Proceed until all the wax is removed from the paint.
If at any time you accidentally dropped the towel to the floor, grab a fresh microfiber towel before proceeding. You don’t want to gamble with the risk of scratching the paint at this stage.
If you prefer to use a machine for this procedure, you are welcome in doing so, but make sure you’re using an orbital buffer with the right foam attachment.
Step 6:
Now, step back and admire your work. Looking pretty good, right?


In the event you see light hazing after waxing, grab a small spray bottle filled with clean water, lightly mist the paint, and give it a quick buff using a separate microfiber towel.
You’re done! It’s not difficult to wax a car. In fact, some people (including yours truly) find it therapeuticfor lack of a better word.
How to wax a car with a DA polisher
The preparation part of the wax process would remain exactly the same whether you are applying wax by hand or with a DA polisher.
With a DA polisher you are going to need to use a soft foam applicator pad and not one of the heavier duty cutting pads that you would use for polishing. It’s vitally important that you invest in as good a quality pad as you can afford.
Step 1:
Set the speed on your DA Polisher to a low setting of around 2-3. Remember, you aren’t cutting here, so you need all that much speed. A low speed setting will be more than enough to apply wax with.
Don’t apply pressure and just let the pad do the work.
Step 2:
Apply theliquid wax to your pad. Again, don’t apply too much product as it will become extremely hard to remove. The thinnest possible layer is best.
Step 3:
Place the pad down flat on the paint and apply no pressure, move the pad over the paint to spread and work the wax into the paint.

When using the DA polisher, I like to work in a hatch method. Meaning I go in straight lines from left to right and up and down, just as you would if you were polishing your paint. I don’t have a reason for this other than I feel safer doing this method with the extra power from the DA over using a hand applicator.
Step 4:
Use the swipe test to see if the product has had long enough to cure. If the wax comes off easily with your finger leaving no haze behind, then it’s ready.
Buff off using a plush microfibre towel and you are set.
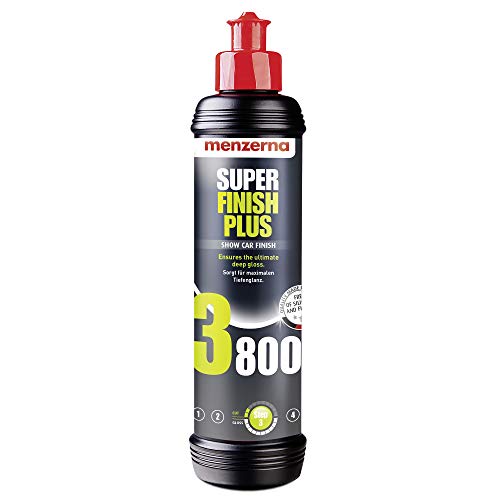
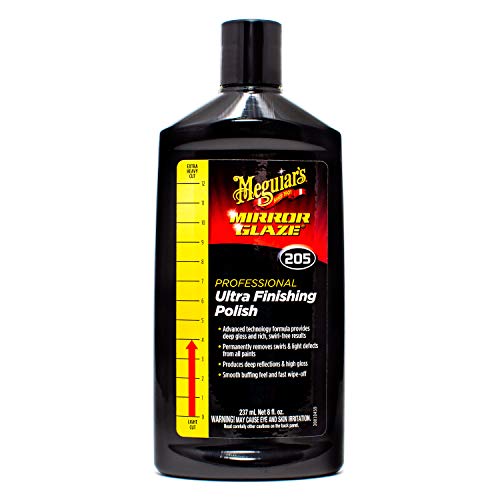
What is the best car wax?
I’ve written many articles on the best car wax and to be honest, it’s tough to really choose one that stands out over another. Each wax can have its own merits depending on what you want from that product.
There are a couple that I am keen to recommend though:
If you are looking for the best of the best and budget is not an issue, you have to go with Swissvax’s Crystal Rock car wax. Not only does this wax offer unrivalled aesthetics, but it beads like crazy and is super simple to apply.
The price tag may be a little off-putting to some, but trust me, a little goes a long way and a single tub will last dozens of applications to your car.
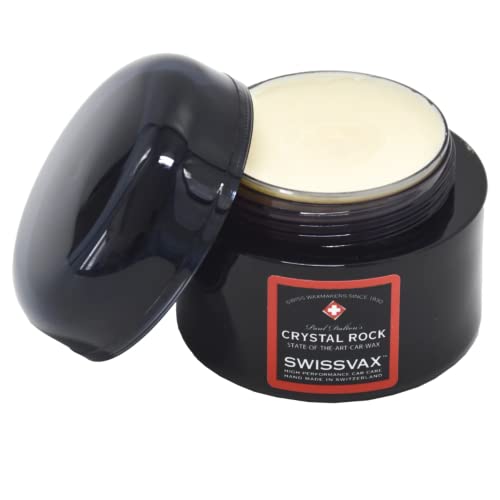
- Concours-wax with over 76% Vol. of pure ivory coloured Grade one Carnauba wax from Northern Brazil
- Special development for Paul Dalton in Great Britain, one of the most famous automobile detailers in the world
- Produces a streak-free gloss and enhances the paintwork surface with best beading characteristics
As a cheaper alternative, I’d highly recommend that of Collinite 915. This stuff is crazy good for the price….and I mean crazy good!
I’ve been using this for years on my own cars as well as friends and family’s cars, and the finish is incredible. It is rock solid in terms of durability and is my go-to wax for when the winter months come in especially.

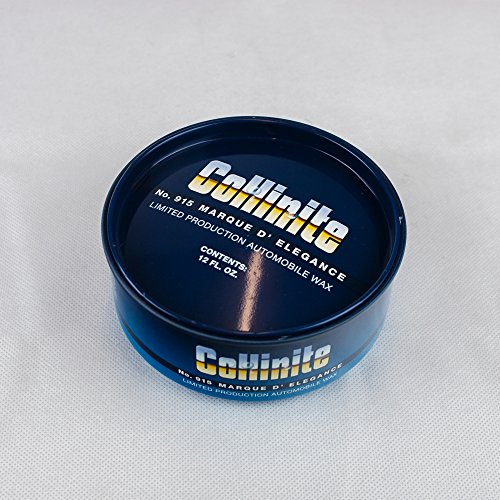
- Comes With Applicator & Polishing Cloth
- Limited Production
- Used For Automobiles
Quick tips
Here are a few quick tips that you can take of note of. Some of these come in really handy.
- Microfibre towel – Try and get as good a quality microfibre towel that you can. I like to hit around the 300-400 gsm and from a reputable company, such as The Rag Company.
- Less is more – Do not over apply your car wax. It only wastes the product and makes it super difficult to remove. It’s a myth that applying thicker layers results in better longevity of the wax. Thin layers will save you time and money, and also offer a much better level of protection.
- Prep, prep, prep – I keep harping on about prep, but you need to make sure the car is clean and defect-free to get the best results.
- Applicator foam pads – I tend to use and then throw away applicator foam pads as they are so cheap. I’m yet to find a method of washing that fully removes the previous wax and the last thing I want is for hardened wax particles on my applicator the next time I use it. Buy in bulk to save money and then in the bin when finished.
- QD spray for top up – You don’t need to wax your car after every wash, so you can just use a Quick Detailer spray after maintenance washing to rejuvenate the wax. The best one I’ve use is Sonax BSD, and it’s dirt cheap as well!
- Read the instructions for application – Each wax will come with a manufacturers guideline of how to apply said wax. Read it! They know as well as anyone and they can differ from each.
Do I need a pre-wax cleanser(IPA)?
A pre-wax cleanser is good for removing oils and synthetics that can be left behind from polishing or use of a sealant. Do you need one? No. Can you use one? Yes.
I admittedly don’t use one every time. Maybe I should, but I’m just being honest. I actually found that it didn’t make a huge amount (if any) difference when using one or not using one. If I were undergoing a full transformation with 2 stage polish and correction, then I’d likely use one. If I was carrying out an added layer in time for winter, I probably wouldn’t.

- Dries to a buffable haze after a short while
- Stays wet for workability
- Oils make the surface glossy & smooth – allow
FAQ
How often should I apply wax to my car?
It all depends on the longevity of the wax. Not all products are the same. Synthetic waxes or polymers can last for three to six months depending on the amount of weather exposure. But in my experience, carnauba wax can last for a month or so depending on prevailing weather conditions.
In my personal opinion, it is advisable to wax at least once every three months, or at the beginning of each season. If you have a brand new car, waxing the paint once a month will help preserve and maintain a showroom shine.
Which is better: liquid or paste/hard wax?
I personally prefer paste/hard wax over liquid wax. This is because I find it is easier to control the amount of product that I am using when I apply with a paste/hard wax.
There is no right or wrong answer here, I simply find paste wax to be easier to dispense on the applicator pad than with a bottle of liquid wax. However, I must admit that liquid wax is easier to apply than paste wax due to the loose consistency of the product.
Carnauba versus synthetic wax: which is better?
There is a lot of confusion regarding natural carnauba wax and so-called synthetic-based waxes. If you’re referring to synthetic or polymer-based waxes, those products are not considered as pure wax but more of like a sealant.
Synthetic products may provide longer protection and will last longer than regular wax, but most of them are a bit difficult to apply. The paint will also need to be cleaned and prepped prior to applying the sealant.
However, when it comes to providing the highest level of gloss and clarity, nothing beats pure carnauba-based waxes. Carnauba is derived from the leaves of the Copernica prunifera palm tree, which only grows in the fields of north-eastern Brazil. Carnauba is the hardest wax known to man and is utilized by the finest and most expensive auto detailing products in the market.
While products may state a pure carnauba blend, the truth is that carnauba is mixed with other waxes (such as beeswax) and solvents to produce a steady consistency.
How do you extend the longevity of wax?
Using a sealant will allow you to add another layer of protection to your paint and this will also increase the durability of the wax as well. The sealant creates a stronger bond for the wax than it would to the paint, which means that it will last longer.
Sealants are usually in the same form as liquid waxes and can be both applied and removed in the exact same manor.
Another tip is to layer up the wax. You can do this by adding a layer once the wax has cured. Some manufacturers recommend that you wait up to 24 hours between adding layers for a premium bond.
Final thoughts
There we have my guide on how to wax your car. I can’t stress enough how important the preparation stage is to make sure you get the most from your wax.
In my opinion, wax offers the best aesthetics that you can get. Yes, ceramic coatings will last longer, but you don’t get the gloss and that deep shine that a good quality wax can offer. Plus, it means we can keep tinkering with new products, which is always great fun!