How to Repair Stone Chips
Stone chips are a frustrating part of owning a car. What makes them so annoying is how they seem to be unavoidable if your car does considerable mileage and especially if you do a lot of motorway driving, which is why I’m going to show you how to repair stone chips.

Stone chips occur when debris is kicked up from the road and impacts with the surface of your car. The stone will penetrate into the surface and may expose the metal panel underneath. Leaving this untreated may result in corrosion occurring, which can result in a panel becoming rusted.
In this article, we will first discuss how to prevent stone chips, and also how you can repair them if they occur.
Prevention
If you do a lot of track days or a lot of motorway driving, you may want to minimise the risk of your car picking up stone chips. One way to do this is to install a Paint Protection Film (PPF) to your vehicle.
This is a clear polymer film that can be installed to your paint. It becomes the working surface of the vehicle and provided good resistance to scratches, swirls, and stone chips. Your vehicle may even have some PPF installed already; it is frequently found just in front of the rear wheel, which is a stone chip hotspot.
While PPF does have many advantages, it is an expensive process. If it is something you are interested in having installed, you can get in touch with a local installer and seek their advice. Due to the complicated nature of fitting PPF, it is not something I would recommend you do yourself on your own car.
Another way to mitigate the risk of picking up stone chips is to increase the distance between you and the car in front when driving. This is good practice anyway, but of course is not always possible.
How to Repair Stone Chips
Repairing stone chips is not actually as hard as one might think, at least it does not need to be. Chipex are a UK based company that has developed a kit that includes everything you will need to repair any stone chips on your car. It is also available in the US but not in Australia

NOTE : To Purchase Chipex you can click the link above and then when on Amazon simply enter your make and model find the exact paint for your car.
The first thing you need to do when ordering a kit is to find out what your paint code is. This will ensure that the touched-up areas will blend well with the existing paint. For example, if you were to buy a generic ‘blue’ paint from a car parts supplier and use it on your ‘Lightning Blue’ BMW, you would notice a considerable difference.
Your paint code will be printed somewhere on your vehicle. Sometimes it can be found on the sticker that gives the required tyre pressure for your car. I found the code for my Octavia underneath my boot mat. To find your code, simply type in your registration number when prompted on the Chipex webpage and they will show you where to look. Complete your order using the code for your vehicle, and within a few days, you will receive everything you will need.
The box contains:
- Paint
- Blending solution
- Polish
- Micro brushes
- Blending cloths and foam block
- Gloves
- Microfibre Towel

Not only does the kit contain everything you need to fix stone chips, but it also includes fairly comprehensive instructions, so everyone should be able to use it.
The first step is to wash your car, you should do this using a pure shampoo that does not contain any waxes or gloss enhancers. For best results, you should carry out a decontamination on the area you intend to work on. Start by using tar and iron removers, and if necessary, use a clay bar to remove any embedded contaminants.

With the vehicle dry, Chipex recommend you apply a small amount of the blending solution to remove any remaining wax or oils and wipe away. I choose instead to use some panel wipe. You could also use isopropyl alcohol.
Step 1: Painting
Put on the supplied gloves and apply paint to the affected area using the small brushes. Use your finger to smear the paint flat.
Chipex recommends leaving this to dry for between 30 seconds and 2 minutes. You can also apply paint to any deeper scratches, again using your finger to flatten this out. It is a good idea to apply a small amount of paint onto a discrete area of the car to make sure the colour matches.

Step 2: Blending
Next, wrap a paint removal cloth around the foam block and apply a few drops of the blending solution. Do not saturate, as this might discolour the paint.
Wipe over the area from the side and do not apply any excess pressure. You will see the excess paint is removed from the area.

Step 3: Polishing
You can use the supplied polish to increase the gloss on the surface. Wrap the cloth around one finger and apply a small amount of polish. Work the polish into the surface using circular motions. Once the polish turns clear, wipe away any residue.

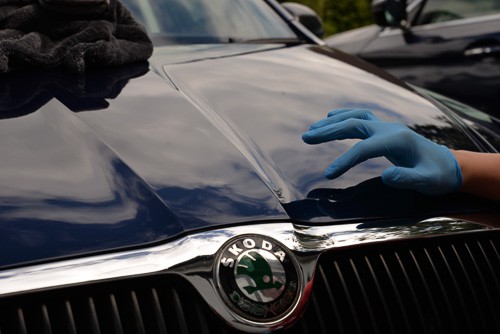
It really is as simple as that; I was amazed at the improvement made to the peppered bonnet on my car. If you do have a paint shop local to you, they might also be able to blend a touch-up kit exactly to your car’s colour. You will however have to source the other products separately.
I struggled to get the camera to focus on my repairs, but I am really happy with the results. I was also able to touch up a few deeper scratches on the car, which had been too deep to polish out.
Important Things to Note
Chipex makes some recommendations for using their kit which you should follow for best results, these include:
- Do not apply paint to a recently resprayed panel (within 2 months)
- Do not let the blending solution spill onto headlights or other plastics
- Do not jet wash the car or two weeks following the repair
- Do not apply on a hot surface
FAQ
How do you touch up stone chips?
The key to a good repair is using the correct colour of paint for your car, otherwise your repair will stand out. Use a small paint brush to apply the paint and flatten using a gloved hand. Use a blending solution to remove excess, and polish to a shine.
Do dealerships sell touch-up paint?
A dealership should be able to find your colour code easily and order the correct paint for you.
Can you touch-up over rust?
For the best results you should remove any rust before touching up the chips. Use a very fine grade sandpaper to remove the rust and avoid touching the paint if possible. Tape around the chip for best results.
Do I need to clear coat over a touch up?
No, for all the area that the touch up covers, spraying a layer of clear coat might result in more problems. The touch up paint will apply enough protection to the metal. You can apply waxes and sealants over the area a few weeks after the repair.
How do I smooth out a touch up?
If a touch up is sitting proud of the surface, you can use wet and dry sandpaper to level this. Start with 2000 grit wet sandpaper and work up to 3000. Use a machine polisher to remove any sanding marks.