Best Way To Clean Leather Car Seats
It wasn’t all that long ago that leather seats were reserved for luxury cars. But, as the product has now become more affordable, a huge range of cars now take advantage of these durable, yet luxurious seat coverings. Today, I will show you the best way to clean leather car seats.
Unlike ordinary cloth or vinyl seats, leather demands specialist care. I’m here to debunk some mysteries surrounding these procedures. I will also give you a step-by-step procedure that will shed some light on how you should approach the cleaning procedures.
Understanding Automotive Leather
The most common type of leather used in modern cars is called pigmented leather. It is essentially pure animal hide that is washed, tanned, and dyed to achieve the desired texture and colour.
After the vehicle is harvested from the source, the hide is washed and undergoes the tanning process. The most common type of tanning process for automotive leather is called chrome tanning. It is called as such not because the leather is dipped in chrome (which is ridiculous), but due to the chromium sulphate utilized in the process.
Tanning is a rather complicated process that involves a lime bath to remove hair and water from the hide. The leather is then rehydrated by immersing and soaking the material in a chrome-sulfuric acid-bath. The result will be a leather hide with a bluish hue. This signifies the material is ready to be dyed and eventually finished
In most cars, the leather is harvested from select cows. Other premium brands such as Rolls Royce and Bentley prefer bull hide since they are generally thicker and more durable than cowhide.
Why does automotive leather come in many colours?
After the hide is harvested and tanned, the leather will be dyed to achieve the desired colour. The leather will be treated to a coat of primer followed by the colour dye to get the desired hue. During this process, the pores of the leather will be closed as it absorbs the dye from the grain part to the flesh part of the leather.
After applying the colour, every surface of the material is treated to a layer of topcoat or clear coat to protect the coloured layer underneath.
It’s pretty similar to the process of painting a car, right?
The clear coat layer in automotive paint is responsible for the intense gloss and sheen of the finish. But in reality, the clear coat is formulated to protect the colour against fading and weathering. It’s the same with the topcoat in leather car seats.
The clear coat will basically seal the colour in the leather. If the clear coat fades due to ageing and excessive friction, the dye will be exposed to the elements. The easiest way to determine if the clear coat has faded is to watch out for colour transfer.

Here’s a simple test: grab a small microfiber towel and moisten it lightly with clean water. Rub the towel lightly on a particular area and look for signs of colour transfer on the cloth. If you see the colour of the leather in your towel, it means the clear coat has faded away. If not, you’re it should still be intact.
But why I am saying all of this? The best and proper way to clean leather car seats is to inspect the condition of the material BEFORE deciding what cleaning materials to use.
Remember, if your car is still relatively new (probably about two years old with an odometer reading of fewer than 25,000 miles), then applying all sorts of purported leather conditioning products will NOT work!
Leather conditioner is formulated to penetrate deep into the material to nourish and refresh the surface. But with the existing clear coat on top of the leather, the product will just literally sit on top of the clear coat and attract more dirt and grime, which will further aggravate the problem in the first place.
Before discussing the step-by-step procedure to the best way to clean leather car seats, here are some easy steps to inspect and assess the condition of the material before buying a plethora of costly leather cleaning products.
How to Inspect the Condition of Leather Seats
1. Prep your seats
Clean the leather seats and leather-covered interior trim using a vacuum cleaner. Pay attention to the seams and stitching. It is best to suck out as much dirt, grit, and sand from the surface to avoid frictional damage as you clean or sit over the leather seats.
2. Take a sample
Grab a damp microfiber towel and wipe each surface thoroughly. Do not apply intense pressure when wiping the leather seats. If you find hard to remove stains, leave it alone. You’ll deal with that later.
The trick is to remove excess dirt and grime from the top of the leather. Now is also a good time to check for colour transfer. Pay attention to certain areas in the leather seats that succumb to colour transfer.
3. Review results
Assess the amount of cleaning required. After vacuuming and wiping the seats, you can now prepare to move forward. If the seats are still excessively discoloured due to deep-seated dirt and grime, you will need a proper leather cleaner. If the seats are fine and clean enough after the initial wipe (such as the case on newer cars), there isn’t much you need to do.
However, applying a leather shield is highly recommended to further protect the leather seats from friction damage. For older cars (with wrinkled and faded leather seats), applying a nice and even coat of leather protector will nourish and restore the look of the leather surface. More on those later.
Best Way to Clean Leather Car Seats
By this time, I’m assuming the leather seats are still discoloured and dirty. Don’t fret. You can easily clean and restore the appearance of leather seats without buying expensive cleaning products.
Below I’ve listed OPTIONS here on how to best clean your leather car seats. If the first phase gets them clean, then stop. If not, move onto the next option.
You may find that a combination of options works best. Just test, evaluate and then execute.
Maintenance cleaning:
1. Leather Wipes
I love to use a simple leather wipe like the ones from Dr. Leather. I’ve been using them for years and they get rid of any everyday muck that you the leather will inevitably pick up. They also leave a matt-sheen, which is just the look I want.

2. Simply wipe and dry
The leather wipes are just like you’d use a face wipe. Just wipe the seat and use a soft microfibre to dry the seat.

- Specifically designed for modern-day leathers
- Gently cleans the all-important coating of the leather
- Restores original feel and look to the leather and unique chemistry recreates the new leather aroma
For Moderately Soiled Leather Surfaces:
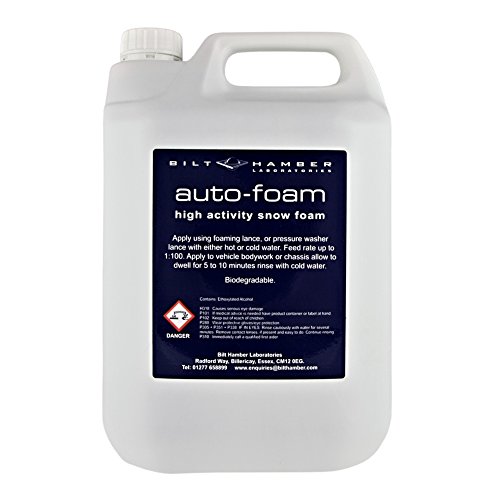
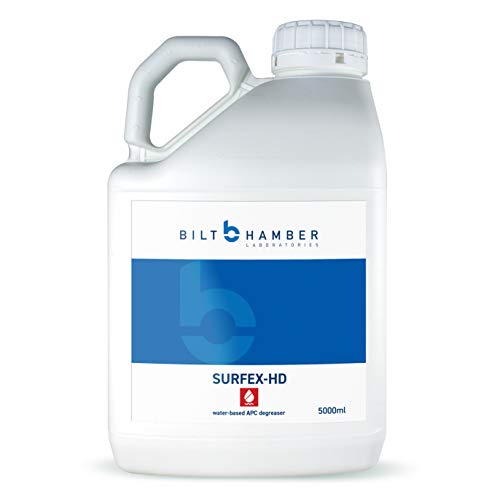
1. Use a microfibre and leather cleaner
All you need is a clean microfiber towel and leather cleaner. Now, there is much debate in using APCs or all-purpose cleaners for this step. I personally stay away from commercially-available all-purpose cleaners unless I’m certain the product is water-based, PH neutral, and safe to the environment. In order to be certain, it is best to use a proper cleaner that is formulated specifically for leather automotive seats.
2. Wipe and agitate
Spray the cleaner directly over the leather surface. It is also a good idea to apply the cleaner on the towel as well. After that, wipe the towel gently using gentle back-and-forth strokes to work the cleaner over the surface. Do not hesitate to apply more of the leather cleaner as needed.
3. Thoroughly dry the leather
Before the surface begins to dry, grab a dry microfiber towel and wipe the surface to dry. If you do it right, you can now see a difference in the appearance of the leather. Repeat the steps above to clean all the seats.
For Extremely Soiled Surfaces:
1. Boost cleaner concentration
If the leather seats are covered in hard-to-remove muck, spray the leather cleaner directly over the soiled surface to loosen up the dirt on the surface. You may need to boost concentration levels of your cleaner and allow to sit for longer.
2. Agitate with soft-bristled brush
Grab a soft-bristled leather cleaning brush and agitate the wet surface to lift off the dirt from the material. Spray more of the cleaning solution if deemed necessary.
The brush is going to provide stronger cleaning power to remove stubborn dirt, but be careful not to apply too much pressure as it can mark the leather.
3. Clean, dry and assess
Wipe away the cleaning solution using a dry microfiber towel. Buff the surface lightly and check for any remaining dirt and stains. If you still find specks of deep-seated dirt, repeat the steps above until the surface is thoroughly clean.
Remember NOT to use harsh detergents such as dish soap when cleaning leather seats as they can actually do more harm than good. Only use cleaning products that are approved for leather car seats.
4. Use a Dual Action Polisher
I’ve added this in at the end as it’s really my last phase when it comes to cleaning leather. I use it only when all else has failed and when I deem it necessary.
So you may be thinking that DA polishers are just for paint, well that’s not strictly true. They can be used with bristle attachments for things like cleaning leather. As you can imagine, it works fast and hard, so don’t hold in one spot for too long…just as you would with paint.
If you don’t have a DA polisher, then you can pick up attachments that fit into your drill bit that work just as well.
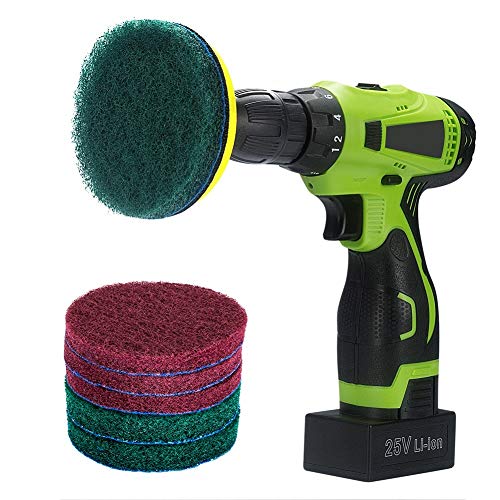
- ✔ SCRUB PADS FIRMLY ATTACHED – All scrub pads are backed with a layer of fleece fabric, so they can be firmly attached to the attachment, and will…
- ✔ SUPER EFFICIENT CLEANING TOOL – Works great on tiles, tubs, glass, stone, porcelain and leaves no scratches on the surfaces. Use them on big flat…
- ✔ TWO DIFFERENT STIFFNESSES – The green pads are a bit stiffer and thicker than the red ones. The red pads are soft enough to clean a clear glass…
Bonus – Steam cleaner

Steam cleaning can be used on leather that is particularly tricky to clean. But, you need to be careful when applying the heat and the water that comes with steam cleaning.
A good tip is to include a microfibre towel over the end of your steam cleaner. As the steam opens the pores of the leather, the microfibre will lift the dirt.
Also, whilst the seat is still wet, you can apply some leather cleaner to the seat and then agitate using a soft-bristled brush.
This is probably the most effective method of cleaning leather seats, but can also be the most dangerous. As long as you use some common sense and apply a little bit of caution then you should be good to go.
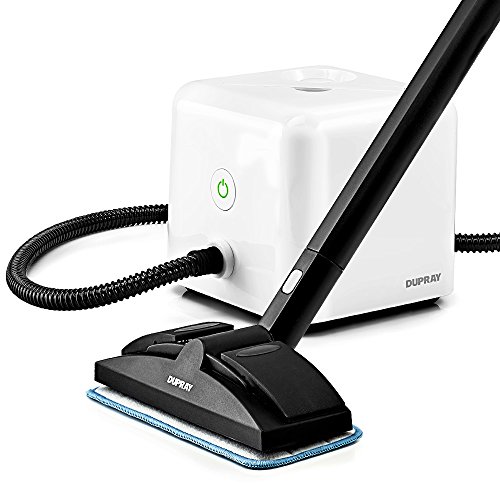
- CLEAN. DISINFECT. SANITIZE. DEGREASE. ANY SURFACE. CHEMICAL-FREE.
- POWERFUL SUPERHEATED STEAM: up to 275°F/135°C.
- LARGE CAPACITY: Up to 50 minutes of cleaning time per fill up.
Applying Leather Treatments

After light or moderate cleaning, the leather seats will benefit from a light coat of leather shield and/or leather protector. There are a lot of products designed to protect and nourish automotive leather surfaces, but I like using Colourlock products for this job.
I particularly like using the Colourlock Leather Shield in newer cars. The product is designed to further protect the topcoat in the leather to prevent damage caused by friction and abrasion. If you want to maintain the look and feel of the leather interior in your vehicle, it is best to treat the leather seats with a leather shield or some other similar product at least once a week or twice a month.

- Made in Germany
- Protects the leather from disintegrating by keeping it soft and supple. Foam dispenser bottle ensures cleaner lasts longer
- Contains antioxidants and UV filters. Can be used on car seats, sofa sets, bags and jackets
But in older cars, applying a leather protector after cleaning is your best recourse. Like I previously mentioned above, if you notice signs of colour transfer after wiping the leather seats, it is time to treat the surface with a leather protector.
Colour transfer or colour stains are the signs of a faded topcoat in the leather seats. Treating the material with a leather protector or leather conditioner will nourish and restore the supple feel of the material. Leather conditioners are formulated to penetrate deeply into the pores of the leather. This is the reason why leather conditioners are NOT required for new or relatively fresh leather seats. The product will simply rest over the topcoat and will only attract more dirt as you drive the car.
FAQ
What is the best way to clean leather car seats?
The best way to clean these seats is by using a dedicated leather wipe, such as Dr. Leather. You simply wipe on, wipe off and then dry, getting your leather looking as good as new.
What household items can I use to clean the leather in my car?
You can theoretically use any leather or fabric cleaner that you would use on household items. You can also use cleaners such as washing up liquid that has been diluted in water, however, results may be limited compared with dedicated cleaners.
Is Magic Eraser safe on leather?
No. This is likely going to remove the colour pigment from your leather and therefore will make it look patchy and faded.
How do you dry leather car seats after cleaning?
The best way is to wipe them down with a plush microfibre drying towel. You can also let it dry naturally, although you may need to check to make sure that no streaks are left following this.
Conclusion
The leather cleaning tips mentioned above are ideal for all colours of automotive leather including white, beige, brown/tan, and even red leather seats. The initial stage will remain pretty much the same regardless if you’re in a luxury car or beaten up banger. The execution should be the only stage that differs here.
The trick is to always assess the condition of the leather seats before deciding on the best cleaning options. This will also prevent you from buying products that you don’t need so you save more money in the long run.