How to Restore Car Headlights
In the past car, headlights were made of glass, making them relatively easy to clean and maintain. Modern car headlights (post-millennium) however are made of plastic and have a clear lacquer coating to provide UV protection meaning that you may need to know how to restore car headlights.
This was primarily done to reduce costs but also increases safety and reduced weight. Over time this coating wears away and the plastic is exposed to UV rays and other contaminants. This leads to photodegradation or colour fading. The clear plastic begins to fade and takes on a bleached appearance.

The result is an unsightly yellowed headlight which detracts from your car’s appearance. As well as looking bad, the oxidisation reduces the amount of light that can pass through. It is a similar scenario to developing a cataract in the eye; light cannot get through which leads to lesser image quality.
Clouded headlights can reduce your visibility when driving at night. You as the driver will be able to see less, and other drivers and pedestrians may not see you so easily. As well as this, clouded headlights can cause your vehicle to fail an MOT test.
With this in mind, we will have a look at the best way to restore clouded headlights to their original clarity, as well as applying some form of UV protection. We will talk about off the shelf restoration kits and using detailing products to fix and protect faded headlights.
Before you purchase products to help you restore headlights, it is important to identify the problem. Some headlights have moisture built up inside them. This cannot be fixed by polishing the exterior of the lens, and the lens will likely have to be removed to remove the moisture.
Headlight restoration kits follow the same principle as using standard detailing tools. The upper layer of oxidation must be removed using an abrasive, then the surface is polished to restore full clarity. After the lens is clear, a UV resistant protective coating must be applied to prevent the headlight from clouding over again.
How to Restore Car Headlights with a Restoration Kit
I must admit at the outset that I have never used an off the shelf kit myself. The majority of the kits contain similar tools, usually some form of abrasive, a rubbing compound and some form of protectant. Most require the use of a drill for polishing, for it would be difficult to restore heavily faded lights without the aid of a power tool.
One kit that has received plenty of positive reviews by independent testers is the 3M Headlight Restoration Kit, which won second place in Project Farm’s recent comparison test (the first place kit is unavailable in the UK).

- Restores cloudy and dull headlights
- Removes scratches and scuffs
- Improves visibility at night
First ensure the surface of the headlight is clean and free of any tar of bugs. You can use a clay bar to remove any of this surface contamination before you start.
Next, it is important to tape off the surrounding area of paintwork to avoid scratching it. Lift the bonnet (or hood) of the car if this gives you better access to the top of the light.

Using a spray bottle, wet the surface of the lens with a mist of water. Attach the sanding disc to the drill attachment and sand the surface using a speed of between 1200 and 1600 rpm.
Move across the lens at a uniform pace and do not apply any excess force. Just let the machine do the work. Apply more water to the surface if it appears dry and use a microfibre towel to wipe it. The lens should have completely clouded over by now, but don’t panic, you are doing it correctly.

Next, using the finer finishing sanding pad, repeat the process, applying more water, as necessary.
Now you can move on to the foam polishing pad. Apply a small amount of the compound provided to the foam pad and spread it over the surface, but do not apply any water. Use the drill in overlapping motions until the lens becomes clear, then wipe any residue with a clean microfibre towel. You may need to repeat the polishing stage to completely clear the lens.
3M does not provide any form of protection product with the kit, so you will need to ensure you remember to wax your headlights when you are waxing your car. This will continue to provide UV protection and prevent the headlights from fading again.
Restore Car Headlights with Detailing Tools
As I restore headlights on a fairly regular basis, I find this method to be more cost-effective than purchasing a new kit every time. I also prefer to apply a more permanent form of protection to my customers’ headlights, as I know there is no guarantee they will regularly maintain them.
I like to have an assortment of wet and dry sandpaper, ranging from 800 grit right the way up to 5000 grit. Not every job will require the full spectrum of paper, but it is useful to have it on-hand. I also prefer to wet-sand by hand as I feel this gives me more control over what I am doing, but others may disagree here.
- 800 Grit Sandpaper – Buy on Amazon
- 1200 Grit Sandpaper – Buy on Amazon
- 2500 Grit Sandpaper – Buy on Amazon
- 5000 Grit Sandpaper – Buy on Amazon
For most headlights I see, starting the sanding at 1200 grit is usually sufficient. I wrap a piece of sandpaper around a firm sponge and wet the surface. Using a crosshatch motion, sand the surface of the lens as the water turns cloudy, this is the oxidisation being removed. Wipe and reapply water as necessary, spraying the surface of the sandpaper as well. When a uniform surface feel has been achieved, move onto finer sandpaper.
If you’ve been using a 1200 grit, you should be able to move up to 2500 grit or even 3000 grit. If you started with 800 grit, move onto 1500, then 2500, then you could finish with 5000 grit. Three steps might not be necessary, but if you ever notice fine sanding marks remaining, use slightly finer sandpaper to remove these.

With the surface now sanded down to a smooth finish, it is time to polish the lens. For this, I use my mini rotary polisher with a firm compounding pad and Menzerna 400 compound.
Apply a few dots of polish to the pad and spread around the lens on the polisher’s lowest speed setting, then increase to half the machines maximum speed. Slowly move the polisher around the lens, letting the machine do the work.
When the lens is clear stop and wipe away any polish residue with a clean microfibre cloth. You may need to clean the polishing pad, reapply some compound and repeat the polishing stage.
After taking the time to restore the headlight, I like to apply a ceramic coating. This gives us long term UV protection. Ceramic coatings are worthy of an entire series to themselves but using a ceramic coat on headlights is a good way for beginners to learn more about how to use them properly. A lot can indeed go wrong when applying a ceramic to a whole car, however, these risks are significantly reduced when only applying to headlights.

With the headlight completely clear, use a panel wipe to remove any polish residue. This will give the best surface for the coating to bond to. Spray some panel wipe onto the surface, and wipe with a clean microfibre towel, this is also a step you could use after using a restoration kit.
A ceramic coating should be applied indoors or at least undercover and protected from the elements for at least 12 hours. If this cannot be guaranteed, a lite ceramic coating, or also a silica coating could be used. These do not have the same durability as ceramic coatings, but can be applied outdoors with good results, and can last upwards of six months.

- This version of CQUARTZ was discontinued in 2018
Both these types of coatings are applied similarly. Put a few drops of product to the applicator pad and apply onto the lens. Leave this for the time specified by the manufacturer and then buff off the residue with a clean microfiber towel. Ensure all residue is completely removed at this point.
Throw this towel straight into some hot water and keep it for interior or dirty jobs. As the ceramic hardens in the cloth it would not be safe to use on paintwork, so these cloths should be downgraded for more general-purpose use.
Leave the coating to cure for the time recommended by the manufacturer before exposing it to the elements. If a ceramic does not appeal to you, you can use ordinary car waxes and sealants. Just remember these will not have the same durability as coatings.
For something with good UV protection that is easy to apply, I recommend Gtechniq C2V3. This can be sprayed onto a clean cloth and applied to the surface, before being buffed with the clean side of the towel.

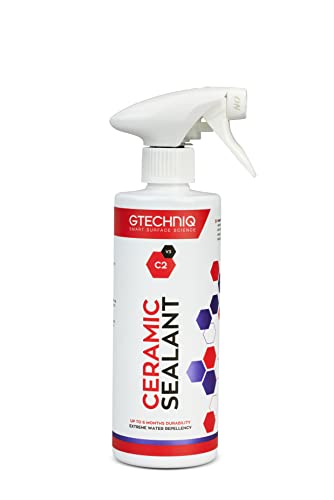
- DIRT AND WATER REPELLENT: For unrivaled protection and a premium finish to your car’s bodywork, look to Gtechniq and their dirt and water repelling…
- EASY TO APPLY: If you’re unfamiliar with applying a ceramic coating, then the C2 Ceramic Sealant. Ensure your car is thoroughly clean and dry, and…
- SCIENTIFICALLY WEATHER TESTED – extensive tests both in the lab and real world, show the coating gives outstandingly high levels of swirl resistance…
After adding the protection, remove the tape and clean up any residue. This is how to restore car headlights.

FAQ
Will toothpaste restore car headlights?
This is a question that frequently comes up in car forums. At first, it makes sense, toothpaste is supposed to clean away yellowing on your teeth, so it makes sense it might work on your headlights. While this is never something I have tried myself, most people who try this find that the results are only temporary. The toothpaste does not provide as much cutting power as sandpaper or polishing compound, nor does it provide any UV protection. Using toothpaste will probably improve the look of severely clouded headlights but remember this isn’t a full solution. Some people have found that adding a small amount of baking powder to toothpaste give more cutting power.
Can you restore cloudy headlights?
When the outside of a plastic headlight becomes faded, this is a fixable problem. The principle is you must remove the hazed layer, polish to perfect clarity, and add protection afterwards. Headlight restoration kits are a great way to achieve results quickly. Regularly waxing your headlights will also prolong their lifespan.
Will WD-40 restore plastic headlights?
People find that spraying WD-40 onto the surface of the lens will improve the clarity and shine of the lens. There are videos on YouTube showing an incredible before and after shot. This, unfortunately, is a very temporary solution. The oil fills any surface scratches, giving a clear appearance. After a wash, however, the headlight will look pretty much as before.
Will Coca Cola clean faded headlights?
Coca Cola is an efficient cleaner. If you have ever left an old copper coin in Coke overnight, you’ll see what I mean. It can also remove light oxidisation from car headlights. It will not be as effective as a polishing compound, but if you like to experiment it might be worth a try. Also, remember to apply some protection afterwards.