How to Clean Alloy Wheels
Ever since they began appearing on cars, car owners have spent blood, sweat, and a considerable amount of money on cleaning alloy wheels. There are many schools of thought when we talk about how to clean alloy wheels, from the ‘washed once a year at most’ to the meticulous attention to detail some enthusiasts go to, leaving us wondering if their car is ever actually driven at all.
As with so many things in detailing, there is not always a definitive right or wrong method. In this quick ‘how-to’ guide I will share some of my experience with you, address some detailing myths and give you a foolproof process for cleaning your alloy wheels.
Best Alloy Wheel Cleaner – Bilt Hamber Auto Wheel

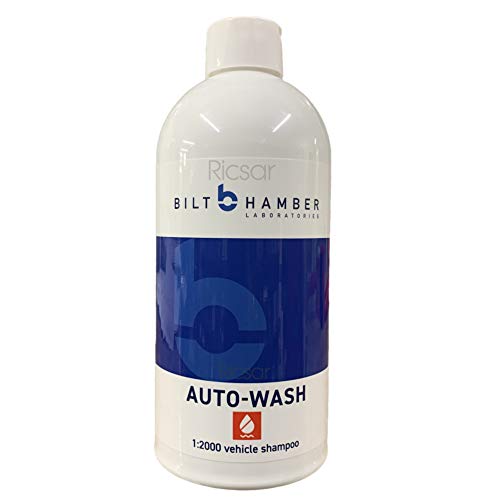
Regular readers will be well acquainted with Bilt Hamber Laboratories, and it should come as no surprise to many that the Essex-based company has an award-winning wheel cleaner as well. Winner of Auto Express’ Product Awards 9 years on the trot, auto-wheel is a colour changing, pH neutral wheel cleaner.
The formulation of ‘auto-wheel’ reacts with the iron particles in brake dust and makes them ‘water-soluble’. With regular use, little agitation is required, a simple spray on, spray off will be sufficient. For more messy jobs, Bilt Hamber supplies a small brush, but we will look at cleaning processes later.
One of the main advantages of ‘auto-wheel’ is the fantastic value for money, blowing most competitors out of the water in terms of value. A bottle also tends to last a while, as two or three sprays per wheel are usually more than adequate.

- Non-acid non alkaline universal wheel cleaner
- pH balanced, Proven number 1 in independent test
- Easy to use colour changing formulation
What are Alloy Wheels?
A good place to start our discussion on cleaning alloy wheels is to first define what we mean by ‘alloy wheels’. I trust wheels will be self-explanatory, but an alloy is “a metallic substance composed of two or more elements.” (Encyclopedia Britannica, 2019)
Automotive wheels are generally split into two broad categories; Steel (often referred to as steelies) and Alloys. Some of you will probably have spotted an obvious error, as steel is itself an alloy of iron and carbon (Nutting & Wente, 2019).
This fact is not lost on me, but in the automotive industry, the term alloy wheels often refer to nonferrous alloys. Most alloy wheels are either magnesium or an aluminium alloy.

Alloy wheels have several advantages over steel wheels. Most, if not all, will agree alloy wheels are more aesthetically pleasing than steel wheels, but they are also lighter, dissipate heat faster, and are significantly more corrosion resistant than steel wheels.
Anyone who has purchased a new vehicle will know the obvious disadvantage, price. A more complex manufacturing process, as well as manufacturers knowing people will pay more for them, results in alloys usually being an expensive add on.
We can all think of that person who seldom if ever cleans their car, let alone their alloys. The unsightly appearance would be reason enough for most of us to give our wheels a clean, but pride should not be the only reason.
Much of the ‘dirt’ on wheels is from brake dust, released when the braking pad material gradually wears down the steel brake disc. This means brake dust is a mostly ferrous metal, and this means oxidisation.
The build-up of this material can have a corrosive effect, and if not removed regularly, can cause ‘pitting’. The clear lacquer protecting your wheel is corroded away, and the alloy needs a costly refurb.
It should also be noted that brake dust is perfectly normal, and for the large part unavoidable, so it is not a sign that your braking system is failing (although remember to have your brakes checked regularly).
There are hundreds of alloy wheel cleaners available today. I can think of at least 10 brands sold in Halfords alone, some cleaners will do slightly different things, some are more potent than others, but we will look at products later on.
How to Clean Alloy Wheels (Wheels On)
We come at last to the part you came here for, how to clean alloy wheels. As I mentioned at the start, one person’s version of “clean” will differ from another’s, so I will cover a couple of different levels of cleaning.
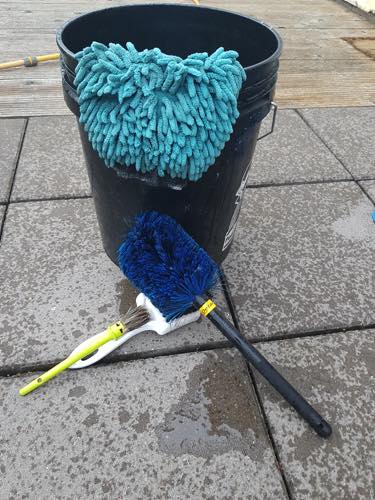
We will start with what I think is the minimum kit required to get the job done.
Dedicated Wheel Bucket – My Pick
A must is a separate bucket that you will use only for wheels, and not for paint. The last thing you want to do is take brake dust from your wheels and rub it onto your paint!
Shampoo – My Pick
Add some shampoo into your bucket, ordinary car shampoo will do the job nicely, although you can also purchase dedicated wheel shampoos.
Wheel Cleaner – My Pick
We will also assume you have a wheel cleaner to hand, as mentioned, ‘auto-wheel’ is a great wheel cleaner to use, but in the words of the BBC, other wheel cleaners are available.
There is a large range of wheel cleaning tools available, some will buy them all, but having a few in your arsenal will see you in good stead.
Wheel Brushes – My Pick
I recommend having a detailing brush that you only use for wheels, this will allow you to access the nooks and crannies found in some wheel designs, as well as clean around the lug nuts. A longer barrel brush will make cleaning to the back of the barrel significantly easier.
I realise this is a step many will not take but ignoring this part of the wheel will just lead to a build-up of corrosive brake material in the barrel. Some will use a soft tip brush to clean the faces of the wheel, I personally prefer to use an old microfiber wash mitt, as this also allows me to reach in behind the wheel spokes, the choice here is entirely yours.
I will cover tyre cleaning (or tire for our American readers) in a later article, but it’s also handy to have a stiff-bristled brush for cleaning the tyre walls.
With our shopping list ever-growing, let’s look at the steps to getting a clean alloy every time.
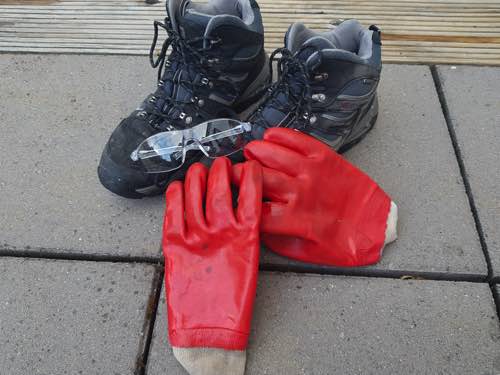
1. Safety First
In my opinion, the first step must be safety. Some will no doubt scoff at this, but I do know of cases where cleaning wheels has resulted in a trip to A&E. Even if your wheel cleaner is not a corrosive (although it may well be), the brake dust you are cleaning away is.
I highly recommend gloves, boots, and safety glasses, as splashback can easily get in your eyes and cause severe irritation. Does this happen often? No, but for the sake of a £10 pair of safety glasses, I think it is best to be safe.
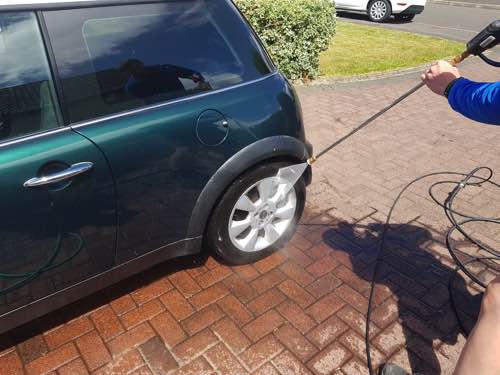
2. Rinse
Step 2 is a simple rinse with running water. A pressure washer will obviously make your life much easier here, but even if using only a garden hose, give the wheels a good rinse first.
Most of the brake dust will come off underwater pressure alone. This not only makes your job easier but means you will not rub excess dirt into the alloy, which can cause scratching to occur.
Take the time now to spray down your wheel arches and tyres also, you will be amazed at the colour of the water that runs out of carpet wheel liners.
3. Contact wash
This is where people will start to diverge based on their personal tastes, and probably more likely, their time constraints. As you are reading an article about detailing, I’ll assume you are keen to get your wheels up to a good standard of clean. Add some shampoo to you wheel bucket and agitate, more suds will increase lubrication and reduce the chances of scratching.
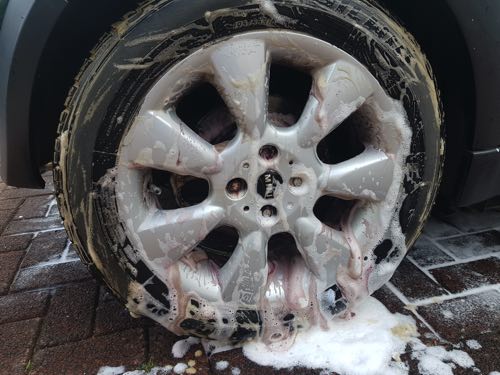
Next, spray your wheel cleaner onto the surface of your wheel, (avoid working in direct sunlight if possible as this might lead to the cleaner drying onto the surface and causing stains). After letting it dwell for a minute or two, grab a detailing brush and gently agitate the cleaner.
If you’re using a colour changing formula like ‘auto-wheel’, it will appear as though you’ve run over a small animal! This is normal.
Next, grab your long handle brush and get into the barrel of the wheel, start at the top and work your way down. If your wheel is particularly dirty, give the brush a rinse with the hosepipe before ducking back into your bucket.
At this stage, I like to give the wheel a quick rinse before grabbing my wash mitt and gently giving the face of the wheel a wash. Using a mitt will make it easier getting to that hard to reach spot behind the spokes, which is where the worst brake dust tends to accumulate. Give your mitt a quick rinse with the hose before putting it back into your bucket.
With all that done give your wheel a final rinse and move on to the next one!
4. Dry and protect
I recommend cleaning alloy wheels before washing the body of the car, it gets the dirtiest job out of the way first. After you’ve dried your paintwork, why not grab a towel for your wheels as well? I recommend using a separate drying towel for wheels.
You can also add protection to your wheels just as you would your paint, for more on that, check out my article on the Best Alloy Wheel Wax.
(For those not interested in taking the wheels off the car, please feel free to skip this next chapter)
Extra Cleaning Steps (Wheels Off)
For most people, steps 1-4 will be more than adequate to clean their alloy wheels, so this is a section for those who wish to go the extra, extra mile.
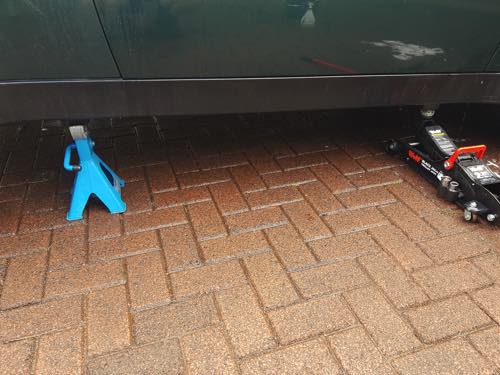
I’ve had many an odd look from the neighbours with my car up on jack stands and each wheel being removed to be individually cleaned, but if you’ve invested in a set of alloys, removing your wheels for a deep clean will only prolong their life.
An annual, post-winter deep clean will shift any salt which can corrode sensitive part of your car. Here is a brief guide on how to safely and effectively carry out a quick deep clean on your alloys and arches.
1. Safety First
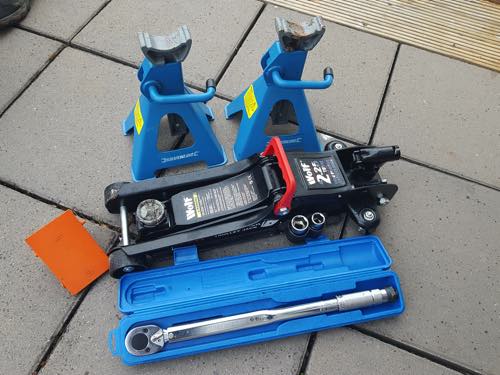
Taking the wheels off the car inevitably adds a greater element of risk. You must not attempt a ‘wheels off’ detail if you don’t have at least an axle stand, a good quality jack, solid ground and a torque wrench.
I don’t want to sound pedantic, but I can’t put a strong enough emphasis on safety here.
2. Lifting the car
With the car on solid, level ground, consult your owners’ manual for the jacking points of your car. If you have 4 jack stands you can take off all 4 wheels at once, do whatever is safest for you.
It’s also a good idea to loosen (but not remove) the wheel nuts before jacking the car up, as this reduces the amount of force on your car. Chock the wheel on the opposite corner of where you are jacking to prevent the car from rolling.

With the car up on jack stands, it’s a good idea to place the jack under a strong metal crossbeam for extra safety. Watch the first 4 minutes of this helpful video to learn how to safely lift your car.
3. Cleaning the arches
With the wheel off, spray snow foam or some all-purpose cleaner onto the springs, wheel liner and calliper. You could grab a firm brush and scrub the arches. Use a detailing brush on the calliper and the springs, finally pressure rinse clean. You’ll see I’ve grabbed some heavy-duty gloves for this job. Larry from Ammo NYC’s video on this step is well worth a watch.

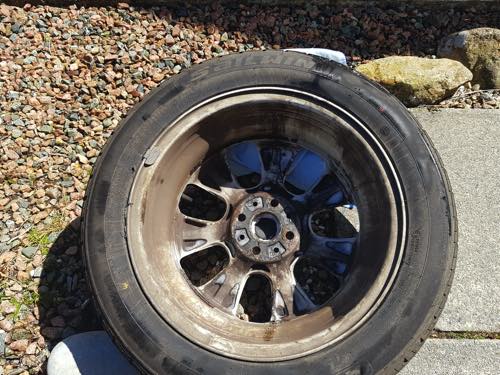
4. Deep cleaning the wheels
You’ve gone to the effort to remove your wheels, so while they’re off, give them a deep clean. Start by cleaning the bits you weren’t able to reach with the wheels on the car. The stubborn bits of dirt might require a bit more elbow grease to clean.
If you’ve been using a standard wheel cleaner, now would be a good time to grab some iron fallout remover, which will remove any embedded iron particles. If you’ve been using a bleeding wheel cleaner, this step will already be completed.

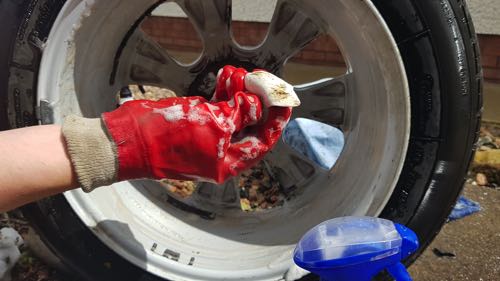
If your wheel hasn’t been cleaned in a while or quite possibly has never been cleaned, you may need a stronger wheel cleaner to get the job done. Here I’m using KKD Devil’s Juice at a dilution of 2 parts water to 1-part product.
This is strong stuff which shouldn’t be used regularly, but it’s the only way this baked-on brake dust will be shifted. If you weren’t wearing goggles and gloves up to now, I urge you to grab some!
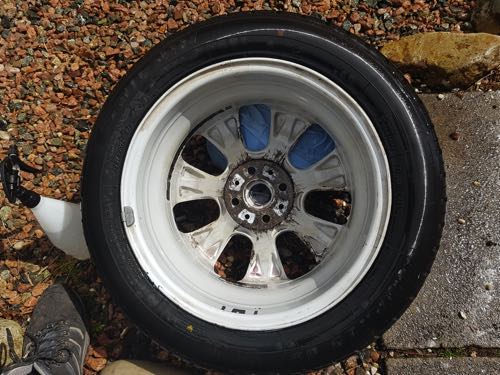
You might also have some tar spots on your wheels, these can easily be removed using a tar and glue remover. With this done, you can use a clay bar to remove any remaining pieces of contamination. There might be a few pitted spots where the surface of the alloy has corroded away and only a refurbishment will fix this, unfortunately.
5. Protecting the wheels
After all the trouble you’ve gone through, you should add some protection to your wheels, this will not only give them a nice shine but will make them easier to clean in the future.
My recommendations for wheel waxes can be found here. With your tyres clean, add some tyre dressing to really make your wheels pop.
6. Reinstall the wheels
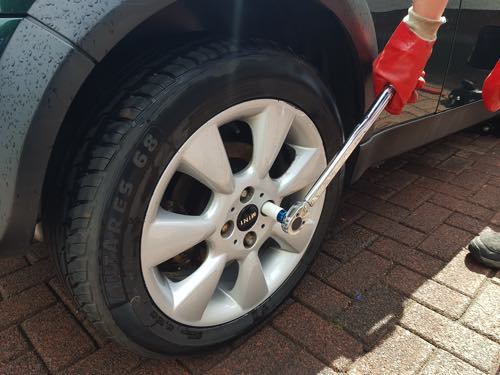
Mount your wheel on the hub, and retighten the wheel bolts by hand, when it’s safe to do so, lower the car to the ground. Check your owner’s manual for the correct torque setting for your car and use your torque wrench in a star pattern to tighten the wheel bolts.
Double-check each wheel before driving, it’s also a good idea to check the wheel nuts are still tight after a couple of miles driving.
7. Step back and admire your hard work!
Important Things to Note
There are some important things to remember when cleaning alloy wheels:
- If your car has gloss black alloys, I don’t recommend using brushes with bristles, gloss black can scratch quite easily, so you’re best sticking to microfibre cleaning tools
- Chrome and diamond cut wheels can be more susceptible to damage from chemicals if your car has these sorts of wheels, it’s best to stick to pH neutral products
- If you have applied a wheel wax or coating, you might not even need to use a wheel cleaner every wash, as it may eat away at your coating. I tend to only use shampoo on coated wheels
- If your alloys have kerb marks, again I advise staying away from any sort of corrosive cleaner. The protection in these parts is gone, so will be susceptible to corrosion
Remember your safety equipment and happy cleaning!
FAQ
Will white vinegar clean alloy wheels?
In a word yes, white vinegar will clean most things, but it is acidic and has been known to cause some pitting in rubber, which could affect tyres and rubber seals. Vinegar has many uses in car cleaning, but wheel cleaning is an area I’d avoid it on.
Does WD40 clean alloy wheels?
WD40 themselves market the product as being able to clean alloy wheels but spraying a lubricant near brakes and tyres posed a risk to safety, one I wouldn’t be prepared to take.
How often should I clean my alloy wheels?
This really depends on the amount of time you can dedicate. Regular cleaning (weekly/fortnightly) will preserve the life and appearance of your alloys. In wintertime, even a high-pressure rinse can help delay the onset of corrosion from road salt.
Can I wax my alloy wheels?
Yes, you certainly can and it will often make them easier to use in the future. Find the best wheel waxes here.
Is it safe to remove my alloy wheels to clean them?
With the use of the proper equipment, and understanding of how to use it, yes. Please not attempt to remove your wheels without the necessary equipment and knowledge.