How to Clean Car Tyres
When it comes to detailing, we often think of cleaning our wheels as a priority. I think for most of us this will be a part of a standard wash regime. However, I wanted to move away from car wheels and take a closer look at how to clean car tyres.
You see, it’s as important to keep your tyre clean as it is your wheels, and there are a couple of reasons why.
The first is that if you’re applying any sort of tyre dressing then you will need a clean surface for it to bond to. I see lots of comments on forums and social media about products not performing as suggested, and I would guess that a vast majority have not created a clean surface for the product to adhere to.
The second is that it keeps the tyre in good shape and improves longevity. Over time, tyre walls can start to corrode and then eventually they will fail. The older the tyre the more common this is.
By keeping your tyres clean you minimise the risk to any contaminants eroding your tyre wall. It also helps remove a browning that can occur when tyres are “on the turn”, which is pretty unsightly as well.
I will be the first to admit that cleaning a car tyre is not the most complicated of detailing processes, but there are a couple of products and methods on how to clean car tyres that I would like to share with you.
Products Needed to Clean Car Tyres

One of the good things about cleaning car tyres is that you don’t need a ton of products to get your going. However, you need to choose wisely at which are going to give you the best outcome.
I’ve included a degreaser and a brush below that I think are essential.
Bilt Hamber Surfex HD

Bilt Hamber Surfex HD is my go-to product for tyre cleaning. This can be used in several ways, but it’s for its degreasing traits that I like to use with tyre cleaning.
The product can lift an insane amount of dirt from your tyre that you might not have even known was there. I tend to use it neat for really dirty tyres, but you can dilute up to 10:1 to make it even better value for money.

- Powerful water-based APC (all purpose cleaner) Safe for virtually all automotive and domestic surfaces (always spot test before use) Biodegradable…
- Item Package Length: 5.7 cm
- Item Package Width: 10.4 cm
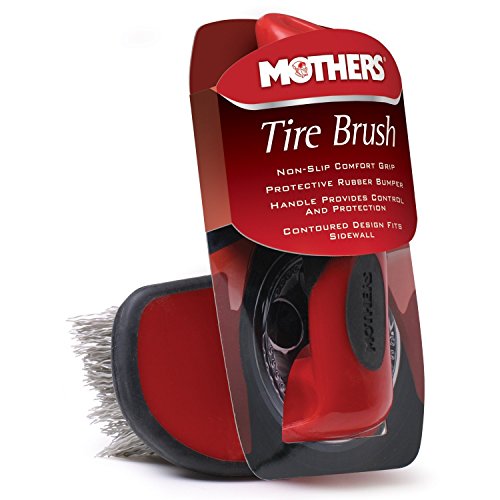
Mothers Tire Brush

The Mothers Tire Brush is my top pick here. It’s the best brush that I’ve tested, and this is for several reasons.
I love the way that the shape of the head has a slight bow to it. This allows you to easily follow the contours of the wheel as you move around the car. I’ve quite low-profile tyres and it’s especially good for these if you’ve not much clearance between the tyre and the bodywork.
It comes with firm bristles that last and an ergonomic handle that doesn’t fatigue after use. Overall, it’s the best that I’ve tested for some time.
Please note that this not suitable for use on your face of your wheel. You will need something much softer as it could scratch and potentially remove paint or lacquer on the wheel.
- Lightweight, ergonomic design
- Non-slip comfort grip
- Contoured to fit your tire’s sidewall
How to Clean a Car Tyre – Step by Step Guide
Before you start, take a minute to have a walk around the car and assess your tyres. You can use an old rag or microfibre towel to have a dry wipe to see how much dirt comes off. This will give you a good idea of how much graft you have ahead of you.

What you might notice from my tyres is that they are fairly new on. They have about 300 miles of driving, but I’ve purposely not washed them since having fitted and they include the lubricant residue that the car body shops so kindly leave behind for you.
I figured that dried on, this would be tough to shift and a good test for the process and the products.
Once you have your car assessed and your products in place, you are good to go.
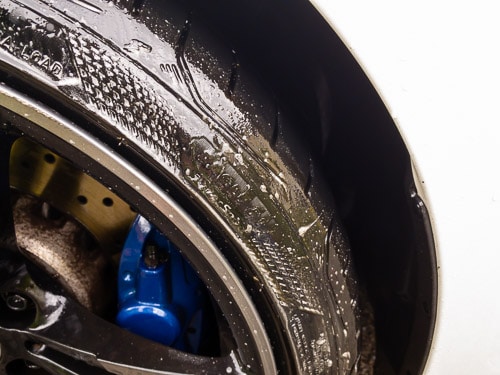
Step 1 – Pre-Rinse with Pressure Washer
I’m not always one for a pre-rinsing, but this time, I think it’s vital. Take your pressure washer and then work your way around the tyre. You can’t do too much damage here so don’t be afraid to get too close to remove as much dirt as possible without hitting your paintwork.

Make sure you work around all four tyres before you start. You don’t need to worry about drying out as we are going to be working on the tyres throughout this process.
Step 2 – Apply Degreaser
We now want to turn our attention to our degreaser. As stated above, I am using Surfex HD by Bilt Hamber and I love the stuff. You can use it on so many different areas of detailing that it becomes extremely versatile.
You need to work out the dilution ratio for your tyre. I am using the product neat, but to be honest, I could have diluted to about 5:1 and I think I would have got similar results. The more dilute you have it, the more elbow grease that you need to apply.

Give the tyre a good covering and then leave to dwell for about a minute. In hot weather, you may need to move quicker than this as you do not want it to dry.
You should see it start to lift some of the product almost immediately, which is a good sign that your tyre is pretty dirty.
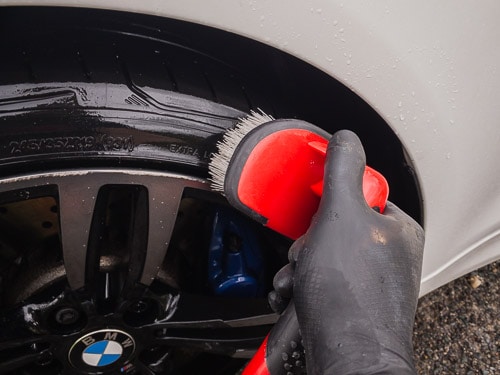
Step 4 – Agitate Degreaser with Tyre Brush
Now we need to get our tyre brush and start to work that degreaser into the tyre. If you do decide to go with the Mothers Tire Brush that I use, then the shape of it will encourage you to move along the tyre wall with ease. If not, just make sure that you don’t catch any of the paintworks as these brushes are designed to be fairly rigid.

Make sure that you give it a good going over here. The more you work it, the more you will get out. With Bilt Hamber Surfex you will notice that it will start to create light foaming, and this will likely include a fair amount of dirt in it. This is good.
Step 5 – Power Wash and Repeat if Needed
It’s now time to power wash your wheels and remove the dirt from them. Again, take your time here and give them a really good rinse.

After you’ve done this it’s now time to inspect. If you feel it needs it, feel free to repeat this process to get your tyres up to scratch.
If you take a clean microfibre towel over it and then check to see if there is any transfer, this should indicate if you need to go again.
Step 6- Dry and Protect
Once the tyre is clean, you can then take a towel to it and make sure that it’s fully dry. There should be no dirt transfer to the cloth at this point and it should be squeaky clean.
Most tyres will give off a deep matt finish. It should be pretty easy to tell that there has been no tyre dressing applied yet and it should look quite uniformed.
Once this process has been complete you are good to go and your tyre is probably as clean as you will get it. I hope you enjoyed my guide on how to clean car tyres!
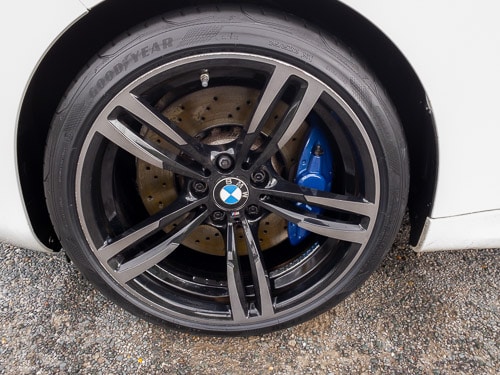
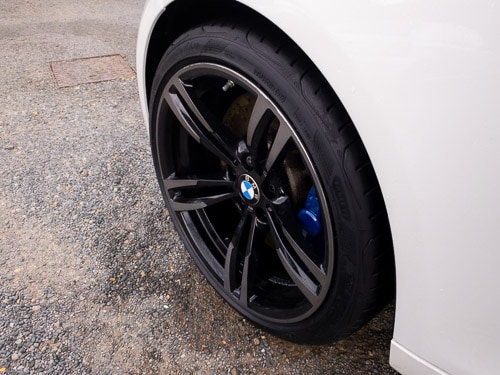
Finished Photos


FAQ
What household items can you use to clean car tyres?
Ideally, you would use a dedicated degreaser, such as Bilt Hamber Surfex as I’ve highlighted in my how to clean car tyres guide. However, you can use something like a baking soda and lemon juice mixture to create a household product. It’s important to keep this off your wheels and paint as it’s going to be a relatively coarse product.
What is the best tyre cleaner?
The best tyre cleaner for me is that of Bilt Hamber Surfex. This is more of a degreaser, but it lifts all sorts of contaminants out of the tyre wall and gets a brilliant finish as a result.
Do I need a dedicated tyre brush?
My advice would be yes. They need to be a strong bristled brush that is capable of working into the firm rubber tyre walls. A softer brush won’t be able to break into the pours of the tyres and remove the dirt.
Do you need a pressure washer to clean car tyres?
It’s not essential, but it will help to remove a lot of the dirt within the tyre wall. You can, however, just use a good degreaser and then a garden hose to flush away the product. You do need to make sure that any degreaser is thoroughly rinsed before you finish as it can corrode a tyre wall if left to dry.