How to Remove Scratches from Your Car’s Paint
Paint scratches can be an unavoidable part of owning a car. Whether it is due to poor washing, or other motorists coming into contact with your vehicle, they are something you would rather not have on your car. Throughout this article, we will look at how to remove scratches from your car’s paint, but first, we need to understand how cars are painted.
Modern cars have three levels of paint. The first layer is the primer layer, which is sprayed onto the metal panels. On top of the primer is sprayed the colour coat, this is the layer that gives the car the colour. On top of this layer is the clear coat. This is the thickest layer on the car. It is a hard clear layer that gives UV protection to the colour coat, as well as giving gloss to the car.
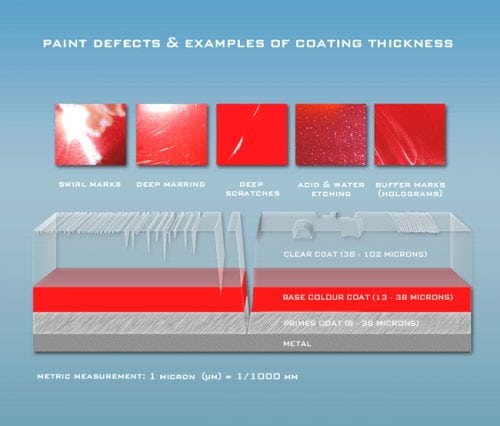
Paint is very thin. A typical depth for the combined layers would be between 100 and 200 microns. That is between one-tenth and one-fifth of a millimetre, so there is not very much room to work with.
If you want to properly remove paint scratches, they must be in the clear coat. If a scratch goes any deeper, you will not be able to polish it out.
A good but not perfect way of telling if a scratch can be polished out is to run your finger across the scratch. If you feel your finger catching on the scratch, it is probably too deep to polish out completely, however, improvements can still be made.


Another way you can tell is by spraying water on the panel. If the scratch temporarily disappears, there is a good chance it will be a clear coat scratch and can be removed. If the scratch does appear to be down into the paint, it will need body shop attention to appear perfect again. However, some scratches like this can be minimised.
Clean and Prepare the Surface
It is important to be working on a completely clean surface before attempting to remove any scratches.
First, completely wash and dry the vehicle using the safe wash method.
Next, carry out a three-stage decontamination. Start with tar removal, next move to iron fallout removal, and finally clay bar the area you will be polishing.
Carrying out these important steps at the start ensures that no grit will be trapped in your polishing pad, which could, in turn, be ground into the paint.
Next tape off any areas you do not want to get polish on, including rubber seals, plastic trim, and door handles.
Paint Depth Gauges
If you are looking to improve your machine polishing game, a very useful tool is a paint depth gauge. This gives you a reading of how much paint there is between the surface and the metal. While only the most expensive gauges will tell you how thick each layer is, you can easily find out how much clearcoat you have to work with. Most gauges will give you a measurement of microns, that is, thousandths of millimetres.
First, ensure the surfaces are clean and free of any waxes or sealants. Take a few measurements on each panel, noting these down. You can then average these per panel. Then measure the paint on the door sill. The manufacturer will use the least clearcoat here, as it will not be exposed to the same conditions the rest of the car will be.
Take the door sill value away from the panel average to give you an estimate of how much ‘extra’ clearcoat there is. Say the panel average is 130 microns and the door sill readings average 90 microns. This will indicate you have approximately 40 microns of clear coat to work with.

This is not a fool-proof method but will give a good indication as to the paint levels on the car. If these numbers are very close, it may be best not to machine polish, for fear of burning through the clear coat.
Gauges come in many different price brackets, but this is a tried and tested product used by many detailers.

- 0~1250µm / 0~49.2mils Coating Thickness Range with Selectable F & NF Sensor Probe
- USB interface for PC software to transfer collected data to computer, 400 memory readings with delete functions and Auto-Power-Off function can be…
- Magnetic and Eddy Current Working Principle, Single and Continuous Measuring mode
I don’t think a depth gauge is a must, but it is certainly a handy tool that will give you peace of mind when polishing your paint.
How to Remove Scratches from Your Car’s Paint by Hand
Hand polishing will be the option most people will use to remove scratches in their paintwork. It is the least aggressive option, but with the right products can still produce acceptable results. It will only be effective for very fine scratches over a small area. For slightly deeper scratches, a machine polisher will probably be needed.

You’ll need a polishing compound. This will be a liquid that contains abrasives which can slowly remove small amounts of clear coat. You’ll also need some sort of polishing media, such as a foam polishing pad.

- NEW FORMULA: Latest formula removes light defects, scratches, swirls and blemishes quicker, with less rubbing and provides polymer wax protection
- USE WITH CONFIDENCE: Quickly removes light scratches, oxidisation, blemishes and swirls without hazing
- RESTORE CLARITY: Exclusive micro-abrasive technology works as a fine scratch remover while restoring clarity and gloss
Apply a small amount of the product to the applicator pad and polish the surface with overlapping motions, using moderate pressure. Polish until the compound begins to turn clear. Stop and wipe away excess from the surface using a clean microfibre cloth. You may need to repeat the process several times before you notice any noticeable improvement.
After the scratch has disappeared, use a finishing polish on the area you have been working on, this will improve the gloss of the paint.


- Rich polishing oils for maximum color depth and radiance
- Rich wet shine
- Removes the finest swirl scratches
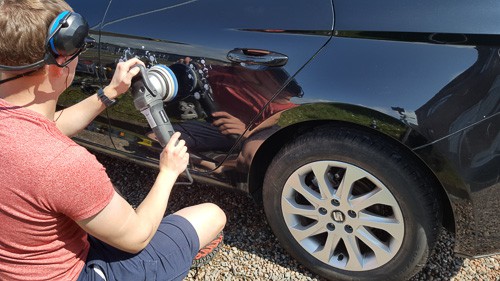
How to Remove Scratches from Your Car’s Paint By Machine Polisher
Machine polishing is a much more efficient way of removing scratches. Machine polishers usually come in two different forms; rotary or dual action. A rotary polisher spins on one axis, giving a much faster cut. The downside to these machines is that they are not suitable for beginners, as they can cut through clearcoat if not used properly. More on rotary polishers.
The other type of polisher is a dual action polisher. These spin in a figure of eight motion. Heat does not build up anywhere near as fast as on a rotary, making them suitable for both beginners and professionals. More on dual action polishers.
Using a Rotary Polisher
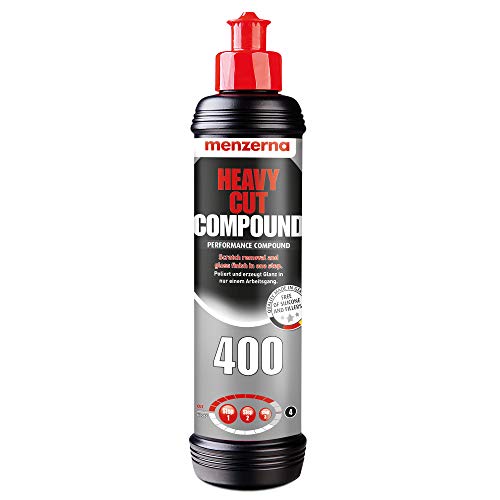
When using a rotary polisher, select a polishing pad and a cutting compound. I’ve had good results using a Lake Country cutting pad and Menzerna 400.
Check out the full Menzerna 400 Heavy Polish Review here.

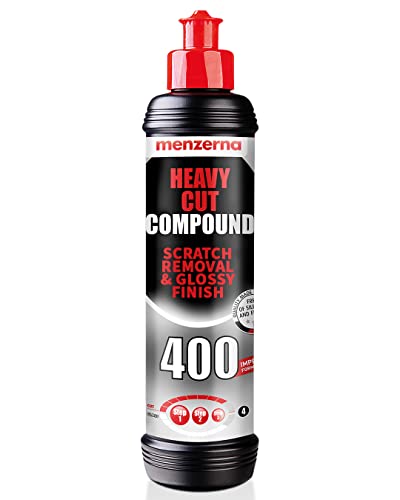
- NO MORE SCRATCHES: This heavy cut polish is the ultimate allrounder polish for your car. It gets the job done without the hassle to switch between…
- POLISH LIKE A PRO: Our Menzerna Heavy Cut Compound 400 is compatible with our red Heavy Cut Foam Pad. By using an Orbital or Rotary polishing machine,…
- BUFFING AND POLISHING are THE key steps to making your vehicle look brand new again. Unwanted Hologram effects, uneven matting and light to medium…

- CCS Technology revolutionizes foam buffing pads!
- Slows the rate of product absorption and saves polish
- Works with a 5″ backing plate
This video gives a much better explanation of rotary polishing than I ever could, so I’d highly recommend giving it a watch before using a rotary.
If you are a beginner to polishing, I would also recommend heading to your local car breakers to pick up a scrap body panel. You should practice on this before attempting to polish on your car.
Add a few drops of polish onto the pad and spread this around the panel with the machine off. Turn the machine on and spread the polish using the lowest speed setting, bump the speed up to about half of the maximum speed. Slowly move the pad over the area, keeping the pad level. Ensure you don’t leave the machine over one place; it should always be moving.
Once the polish has gone clear after a few passes, stop and wipe away any residue. You can repeat a few more times until you see the scratch has gone away but be careful not to polish too much or you could burn through the clearcoat. Remember if you could feel the scratch with your fingernail, it will be too deep to polish out, so do not keep polishing until it does.
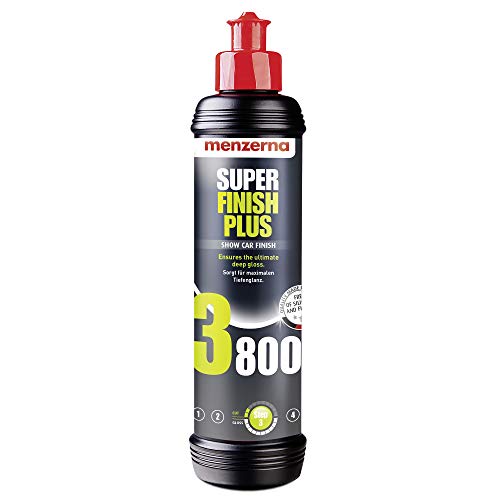
After this cutting pass, you’ll need to refine the paint. Polishing with a rotary can leave holograms in the paint, which are very noticeable on a bright day. These can easily be removed using a finishing polish and pad. I like to use Menzerna 3800 and a black Lake Country finishing pad.

- CCS Technology revolutionizes foam buffing pads!
- Slows the rate of product absorption and saves polish
- Works with a 5″ backing plate


- HIGH SHINE MIRROR FINISH: This Super Finish product is the ultimate finishing compound for your car. It gets the job done without any hassle. It…
- POLISH LIKE A PRO: Our Menzerna Super Finish Plus 3800 is compatible with our green Soft Cut Foam Pad. By using an orbital polishing machine, your…
- BUFFING AND POLISHING are THE key steps to making your vehicle look brand new again. Light marks of usage, swirls, unwanted hologram effects, uneven…
Follow a similar process as before, only you can use an even lower speed setting for the finishing stage. Wipe away the polish to reveal a deep glossy shine.
Using a Dual Action Polisher
As mentioned, a dual action machine will be much better suited to beginners to machine polishing. You can use the same pads and polishes as mentioned in the above section.
Apply half a dozen or so small drops to the polishing pad and spread on a low speed. You can then bump up the speed to a maximum and complete overlapping passes. I find 5 passes to be sufficient to break down to fully work the abrasive.
Wipe with a clean cloth and inspect your work. You might have to polish the section more than once to notice an improvement.
For more help with using a machine polisher, this video is an excellent crash course.
The dual action polisher will not inflict holograms like the rotary polisher, but for best results, it’s best to use a finishing polish for added gloss.
Wet Sanding
Two words that sound like they shouldn’t go together are ‘car paint’ and ‘sandpaper’, but using a fine grade of sandpaper can be a great way to remove scratches, as well as greatly improve the shine of your paint. If you’ve done some woodwork, you’ll consider 300 grit to be fine-grit sandpaper. In paint correction, however, you’ll want to be using between 2500 and 7000 grit sandpaper. This set should be adequate to wet sand your car.

- Package include: 18 pieces high grit sandpaper assortment in grit 3000, 5000 and 7000, 6 pieces for each size
- Appropriate size: 9 x 3.6 inches sandpaper, both manual polishing and place on sanding block are easily; you can also cut these sandpaper to any size…
- Wet and dry: these sandpaper are made of silicon carbide material, super fine and evenly grit on the surface by nano-sand-planting techniques, can be…
If wet sanding is something you’re considering to remove scratches from your car, I strongly recommend buying a scrap panel to practice on.
Again, ensure the surface is clean and dry. You’ll find it helpful to have a spray bottle filled with only water to hand as well. Wrap the sandpaper around a sponge, even a cut up car washing sponge will work. I normally start with 3000-grit, but you can start finer and see if this produces the results you want.
Soak the surface and the paper before beginning to sand the surface. Use light pressure and glide the paper across the scratch. Continue to add water and rinse the sandpaper out frequently. With wet sanding, the scratch should disappear fairly quickly, if it does not, this might be a good time to stop.

Rinse away any residue using running water and dry the surface. You’ll notice the surface will have gone cloudy; this is perfectly normal. Move up to 5000 grit sandpaper and repeat the above process.

With the 5000-grit stage completed, we can move to polishing. Use your machine polisher to polish the paint, following the steps above. You will probably need a heavy cutting compound , like Menzerna 300 to fully remove all the sanding marks.

Protection
With the scratch removed, it is important to add some form of wax or sealant to the surface of the paint. There are hundreds of options available to you here, but you can check out our article on our favourite waxes.
How to Touch Up Deeper Scratches
As we mentioned at the start, some scratches will be too deep to polish out of the paintwork. You can take these to a body shop, but if you want to save yourself some cash, you could try a paint touch-up kit.
These can normally be found at your local automotive paint shop, but we have had very positive experiences using Chipex kits. These come with everything you need to touch up stone chips and some deeper scratches, as well as full instructions on how to use the kit.
You’ll need to find your car’s paint code, but Chipex can direct you on how to find this. First, wash the car as normal. You should then wipe the scratch with some rubbing alcohol or panel wipe to remove any oils or old waxes, these will inhibit the paint from bonding. The kit comes with a solution to allow you to do this.
If you are using a normal touch-up kit, brush a small amount of product into the scrape, adding more if necessary. Be careful not to apply too much product, as this might result in noticeable high spots.
When the paint dries, it may be necessary to wet sand and polish the surface to level the touch-up. If you are happy with the results, leave the paint alone for a few weeks before applying a wax or sealant, as the paint will need time to gas off.


FAQ
Will WD-40 remove scratches from a car's paint?
No, WD-40 will not remove scratches from paintwork. Some people have posted videos online of WD-40 seeming to remove scratches from paintwork. This is only a temporary fix, the oil fills the scratch, making it seem as though it as disappeared. In reality, after washing the scratch will reappear.
Can a magic eraser damage car paint?
Yes, a magic eraser can be very abrasive and is not designed to be used on paint, so should be avoided.
How do you remove scratches from a black car?
You can use the same processes on black paint as any other colour. You should start using a polish either by hand or machine. If needed, you can move up to wet sanding to remove any stubborn scratches.